Row 2:
Ch 1, turn; sc in each stitch across and in ring changing to Off-White in last sc (Fig. 5, page 126); do not cut Red.
Note: Hold unused color to wrong side, now and throughout.
Row 3:
Ch 1, turn; working in Back Loops Only (Fig. 2, page 125), skip first sc, sc in next sc, hdc in next sc, dc in next sc, 2 dc in next sc, dc in next sc, 2 tr in next sc, tr in next sc, work Cluster.
Row 4:
Ch 1, turn; sc in both loops of each stitch across, sc in ring changing to Red; do not cut Off-White.
Row 5:
Ch 1, turn; working in Back Loops Only, skip first sc, sc in next sc, hdc in next sc, dc in next sc, 2 dc in next sc, dc in next sc, 2 tr in next sc, tr in next sc, work Cluster.
Row 6:
Ch 1, turn; sc in both loops of each stitch across, sc in ring changing to Off-White; do not cut Red.
Rows 7-23:
Repeat Rows 3-6, 4 times; then repeat Row 3 once more; at the end of Row 23, cut Red.
Row 24:
Ch 1, turn; sc in both loops of each stitch across, sc in ring.
Row 25 (Joining row):
Turn; holding right side together, working in free loops of beginning chain (Fig. 3b, page 126) and in Back Loops Only of stitches on Row 24, skip first sc on Row 24, slip stitch loosely in each stitch across.
Access 30+ free patterns here
Trim:
Ch 2, with right side facing and working in ends of rows, slip stitch in Row 24, chain 3, slip stitch in second loop of next row (Fig. A), chain 3, slip stitch in fourth loop of same row, chain 3, slip stitch in next row, chain 3, slip stitch in second loop of next row, chain 3, slip stitch in fourth loop of same row, chain 3, place marker around chain-3 just made for joining placement, slip stitch in next row, chain 3, slip stitch in second loop of next row, chain 3, slip stitch in fourth loop of same row, chain 3; repeat from * to *; finish off: 36 chain-3 spaces.
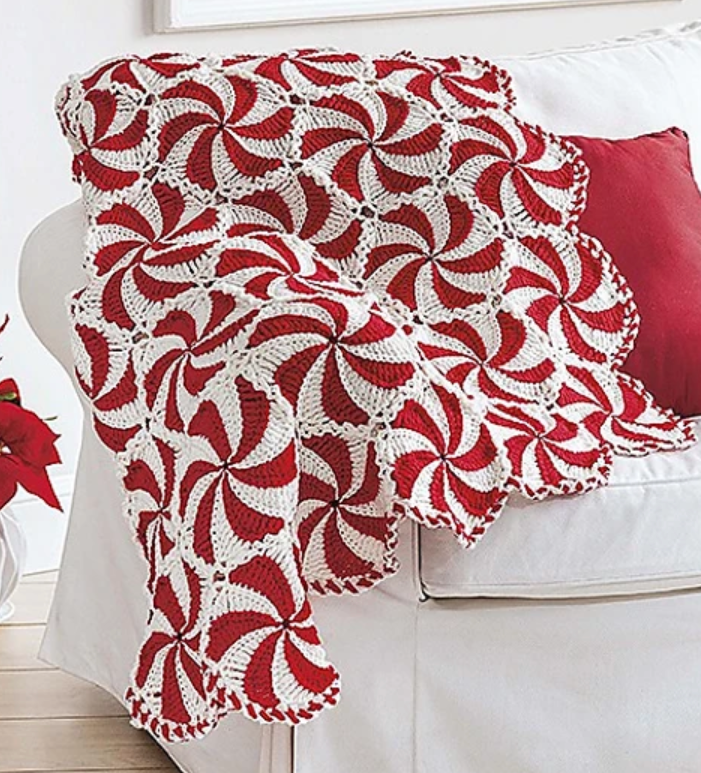
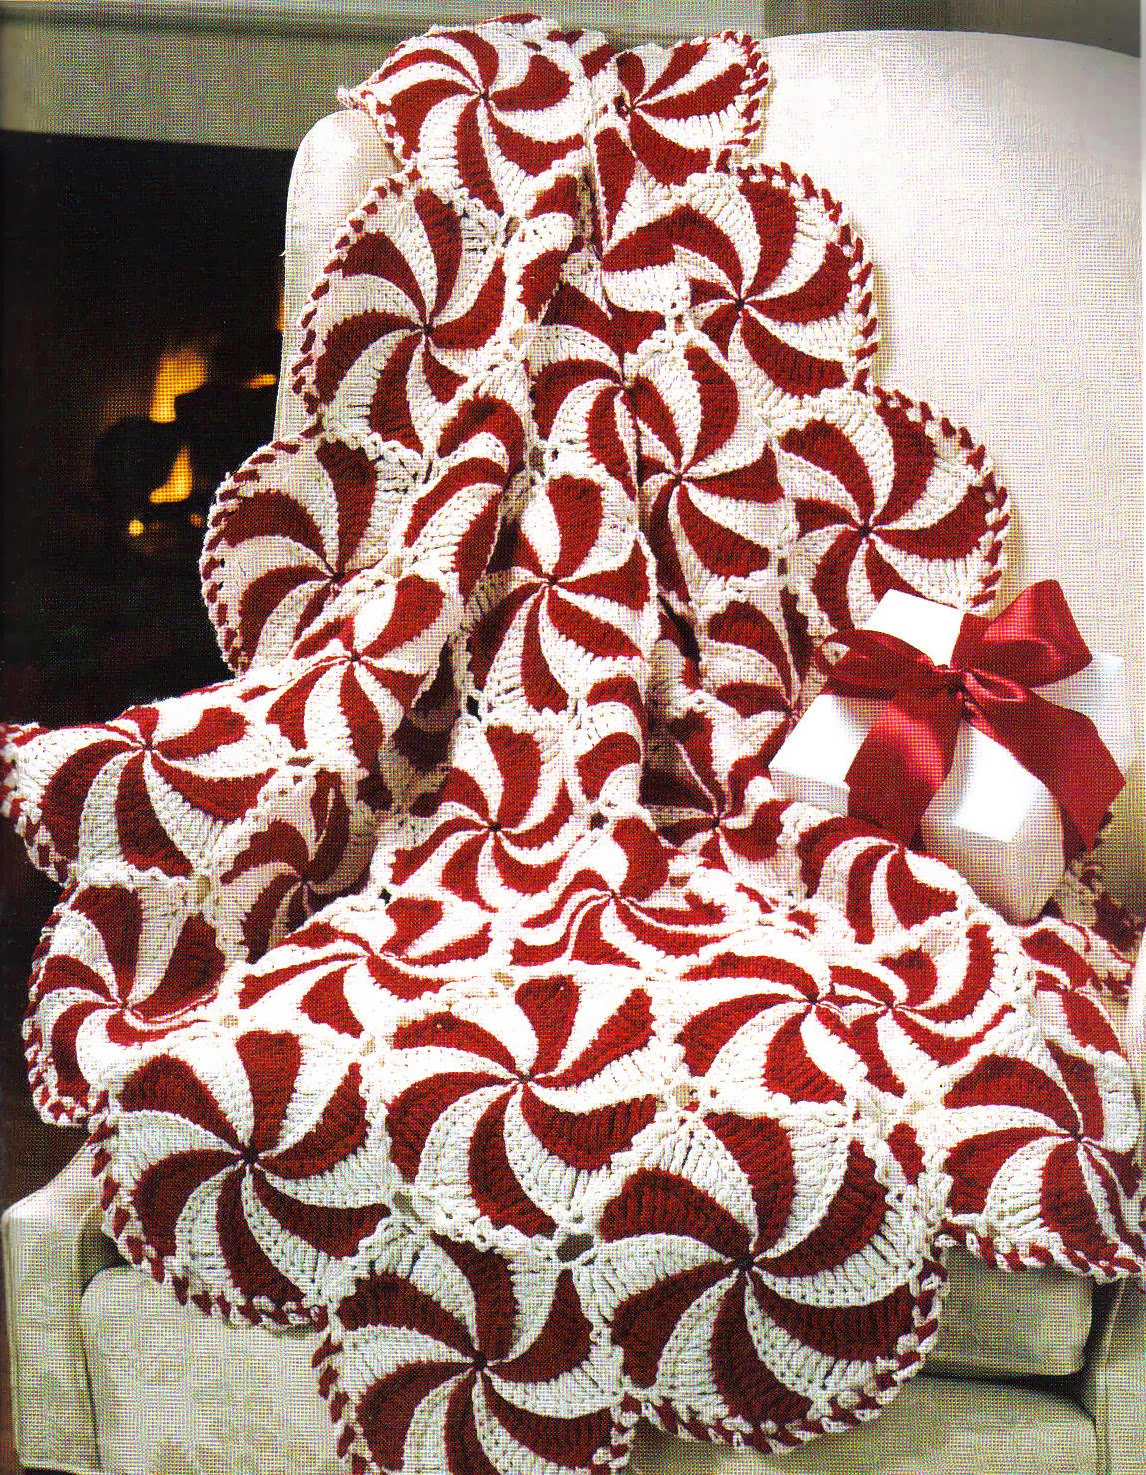
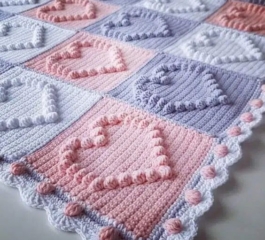
Starlight Afghan Pattern
SECOND MOTIF
Work same as First Motif through Row 25.
Trim (Joining row):
Ch 2, with right side facing and working in ends of rows, slip stitch in Row 24, chain 3, slip stitch in second loop of next row, chain 3, slip stitch in fourth loop of same row, chain 3, slip stitch in next row, chain 3, slip stitch in second loop of next row, chain 3, slip stitch in fourth loop of same row, chain 3, place marker around chain-3 just made for joining placement, slip stitch in next row, chain 3, slip stitch in next row, repeat from * to *; repeat from ** to **; finish off.
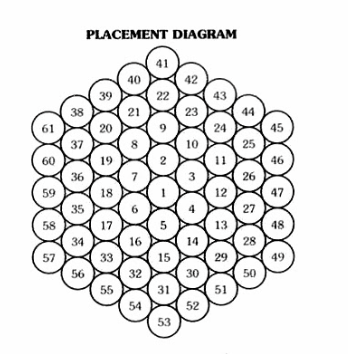
ADDITIONAL 59 MOTIFS
Work same as First Motif through Row 25.
Trim (Joining row): Follow numerical order on Placement Diagram, work Two or Three Side Joining.
TWO SIDE JOINING
Ch 2, with right side facing and working in ends of rows, slip stitch in Row 24, chain 3, slip stitch in second loop of next row, chain 3, slip stitch in fourth loop of same row, chain 3, slip stitch in next row, chain 3, slip stitch in second loop of next row, chain 3, slip stitch in fourth loop of same row, chain 3, place marker around chain-3 just made for joining placement, slip stitch in next row, repeat from * to * 6 times, chain 1, holding Motifs with wrong sides together, slip stitch in marked chain-3 space on previous Motif, chain 1, slip stitch in second loop of next row on new Motif, chain 1, slip stitch in next chain-3 space on previous Motif, chain 1, slip stitch in fourth loop of same row on new Motif, chain 1, slip stitch in next chain-3 space on previous Motif, chain 1, slip stitch in next row on new Motif, chain 1, slip stitch in next unworked chain-3 space on previous Motif, chain 1, slip stitch in second loop of next row on new Motif, chain 1, slip stitch in next unworked chain-3 space on previous Motif, chain 1, slip stitch in fourth loop of same row on new Motif, chain 1, slip stitch in next chain-3 space on previous Motif, chain 1, slip stitch in next row on new Motif, chain 1; repeat from * twice more; join with slip stitch to first slip stitch on new Motif, finish off.
THREE SIDE JOINING
Ch 2, with right side facing and working in ends of rows, slip stitch in Row 24, chain 3, slip stitch in second loop of next row, chain 3, slip stitch in fourth loop of same row, chain 3, slip stitch in next row, chain 3, slip stitch in second loop of next row, chain 3, slip stitch in fourth loop of same row, chain 3, place marker around chain-3 just made for joining placement, slip stitch in next row, repeat from * to * 4 times, chain 1, holding Motifs with wrong sides together, slip stitch in marked chain-3 space on previous Motif, chain 1, slip stitch in second loop of next row on new Motif, chain 1, slip stitch in next chain-3 space on previous Motif, chain 1, slip stitch in fourth loop of same row on new Motif, chain 1, slip stitch in next chain-3 space on previous Motif, chain 1, slip stitch in next row on new Motif, chain 1, slip stitch in next unworked chain-3 space on previous Motif, chain 1, slip stitch in second loop of next row on new Motif, chain 1, slip stitch in next unworked chain-3 space on previous Motif, chain 1, slip stitch in fourth loop of same row on new Motif, chain 1, slip stitch in next chain-3 space on previous Motif, chain 1, slip stitch in next row on new Motif, chain 1; repeat from * twice more; join with slip stitch to first slip stitch on new Motif, finish off.
EDGING Rnd 1:
With right side facing, join Red with slip stitch in any joining slip stitch; chain 4, (slip stitch in next unworked chain-3 space, chain 4) around to next joining slip stitch, chain 4, slip stitch in joining slip stitch, chain 4, (slip stitch in next unworked chain-3 space, chain 4) around to next joining slip stitch; repeat from ** to ** around; join with slip stitch to first slip stitch, finish off.
Diagram
Rnd 2:
With right side facing, join Off-White with slip stitch in any chain-4 space; chain 4, drop loop from hook, insert hook from front to back in next chain-4 space, hook dropped loop and draw through chain-4 space, chain 4; repeat from ** to ** around; join with slip stitch to first slip stitch, finish off.