White
Chain 3, 91DC. Turn.
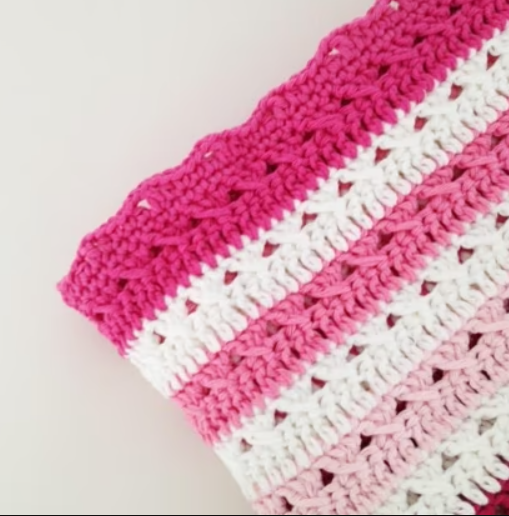
Chain 3 (counts as the first DC). Skip one stitch, 2DC, 1DC in the stitch you skipped. Repeat what’s in between * until you have 1DC left (which is a chain 3). 1DC in the 3rd chain, changing color while doing so. Turn.
Now continue in the same color scheme starting from row 1. Add as many rows as you like. In total, I had 27 rows (note: 1 row is a row of DC + a row of cable stitches). When I had 27 rows (my last row was Shocking Pink), I started working on the edging.
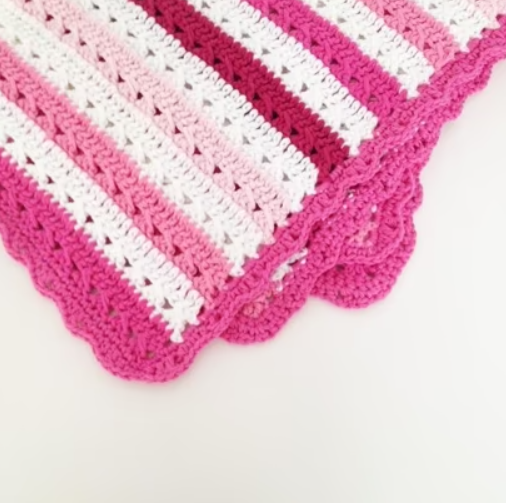
The Edging
Don’t fasten off after the last DC but change color to a color for the edging. I used Shocking Pink for the edging.
- 2 SC in every DC on the first side of the blanket (108 SC in total). Once you’ve reached the corner, chain 1. 1 SC in each of the stitches of the bottom row (92 SC). Chain 1 and do 2 SC in every DC on the other side as well (108 SC). Chain 1 in the corner, 1 SC in each stitch of the top row (92 SC). Chain 1.
- 1 SC, 1 HDC, chain 1, 1 DC, chain 1, 1 HDC, 1 SC. Repeat what’s in between * until you have 3 stitches left. 3 SC, chain 1, and continue the same stitches in between * along the bottom until you have 2 stitches left. 2 SC, chain 1, and continue the same stitches between * along the other side until you have 3 stitches left. 3 SC, chain 1, and continue the same stitches between along the top row until you have 2 stitches left. 2 SC, 1 SLST and fasten off.
See Another Pattern Here!
Final Touches
Last but not least, weave in all ends with your yarn needle and block your blanket if desired to ensure it lays flat and even.
Congratulations! You’ve just completed a beautiful striped blanket that’s sure to brighten up any space. Happy crocheting, and stay tuned for more patterns and crafting ideas on My Crafts Ideas!
Feel free to share your finished projects and any questions you have in the comments below. Until next time, keep those hooks moving.