Amigurumi Patterns

Amigurumi Crochet Bee Free Pattern

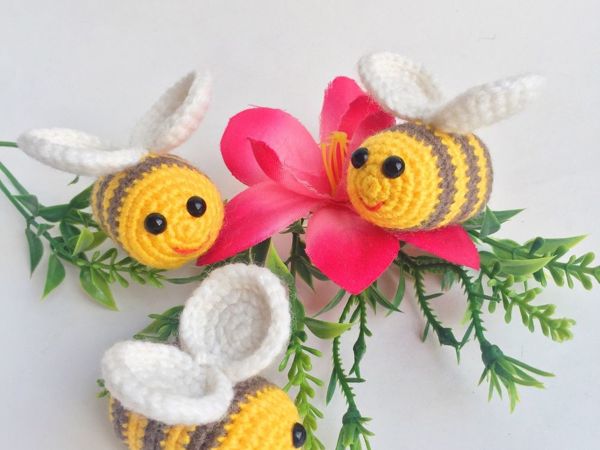
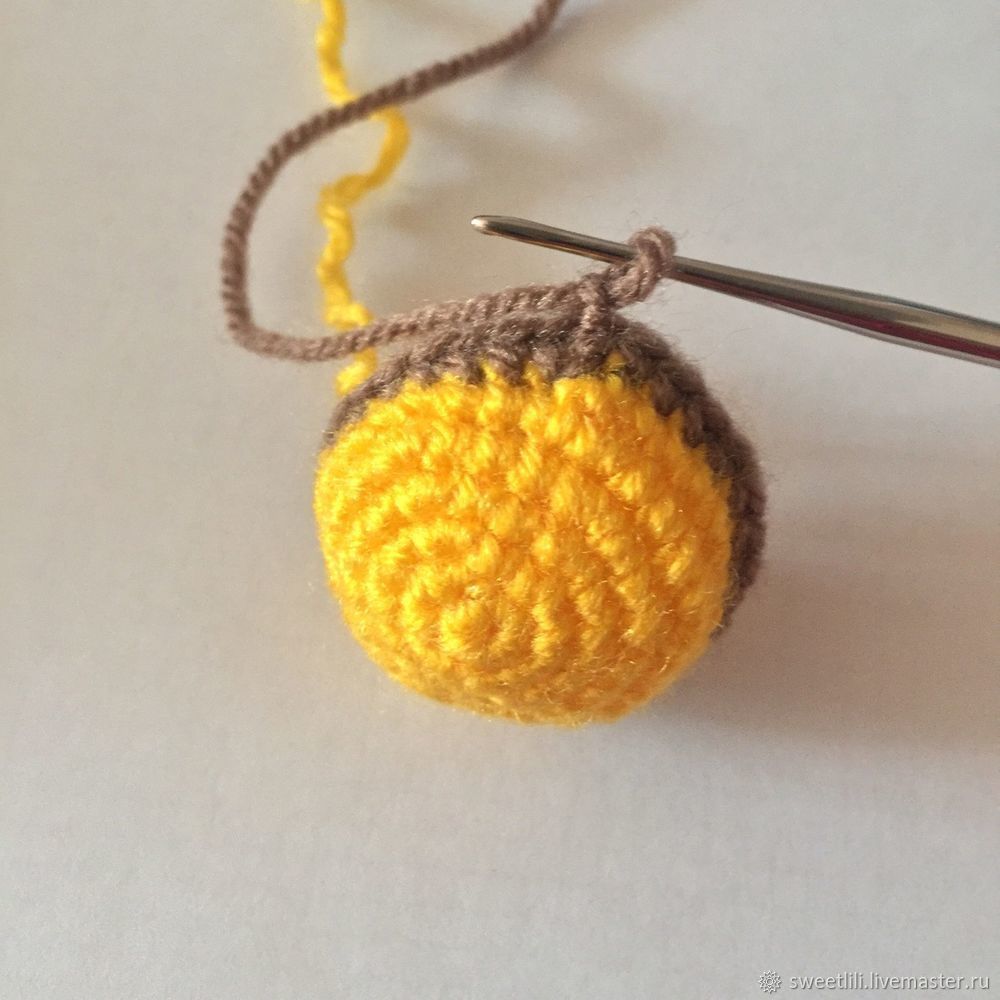
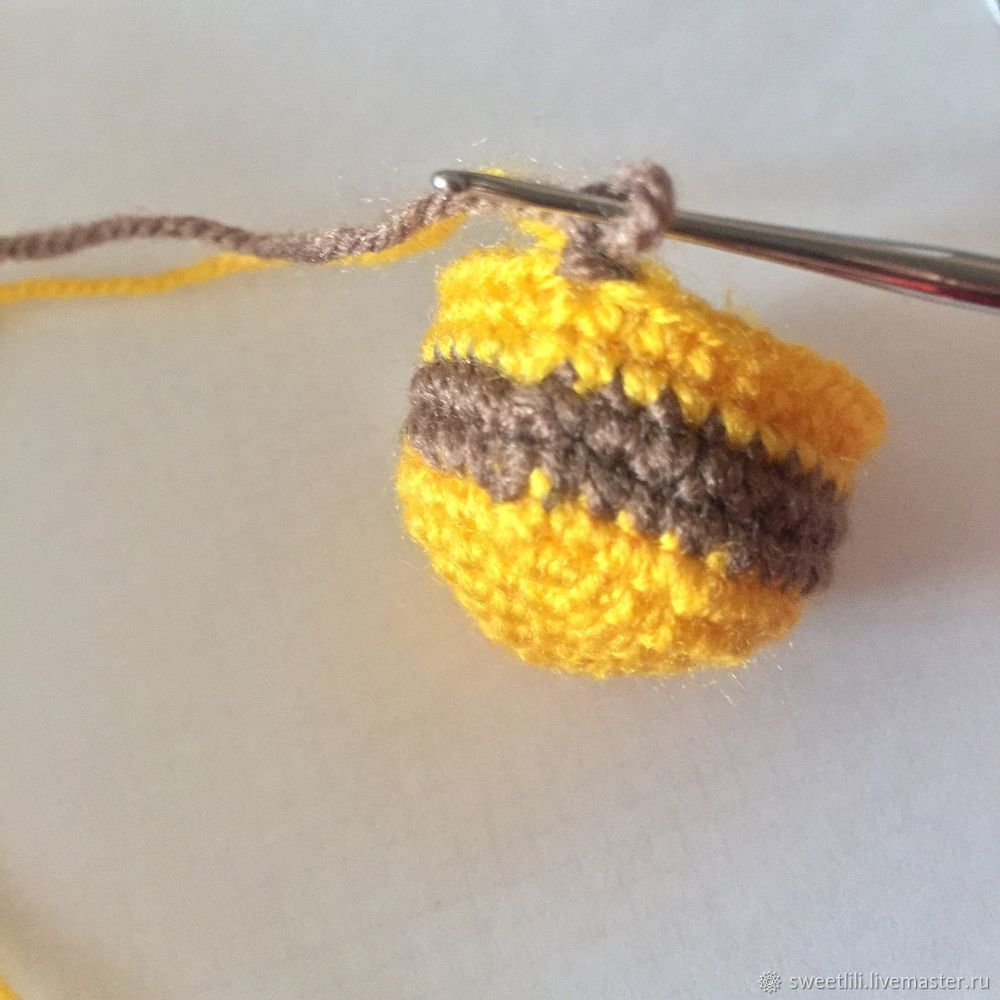
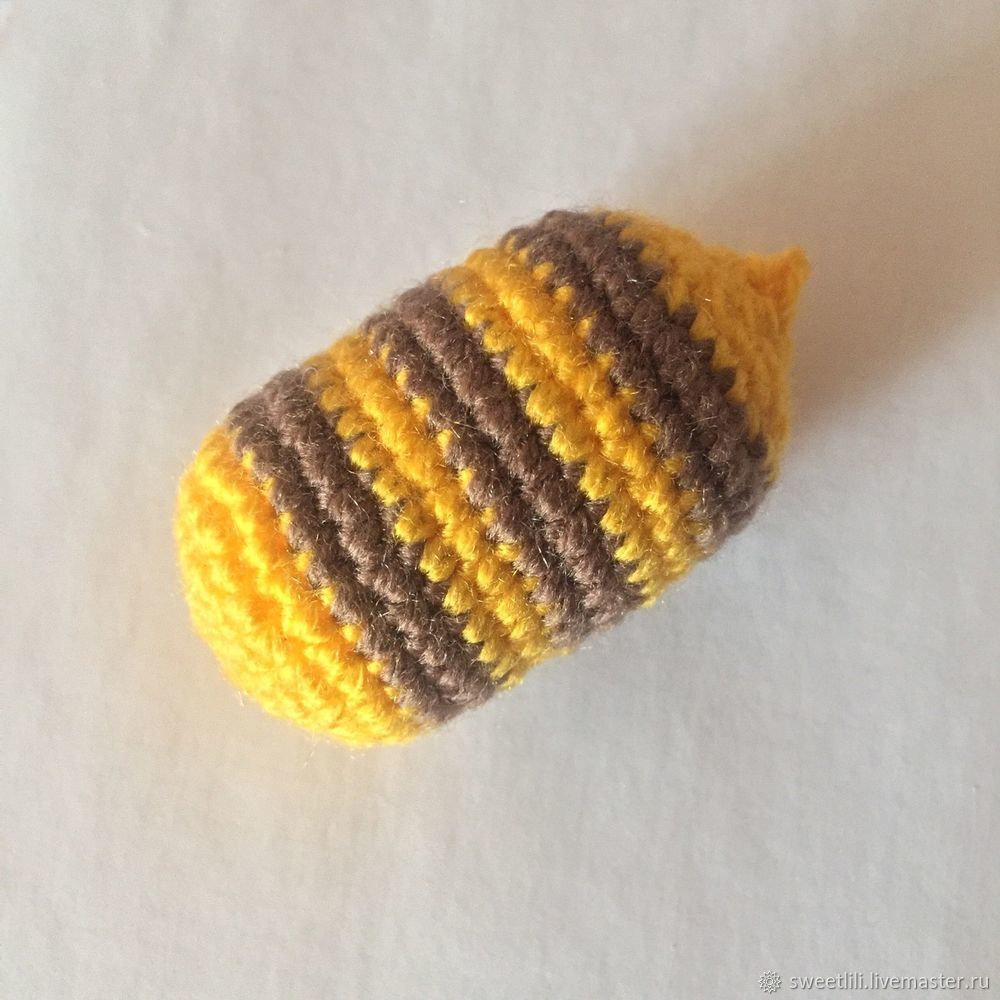
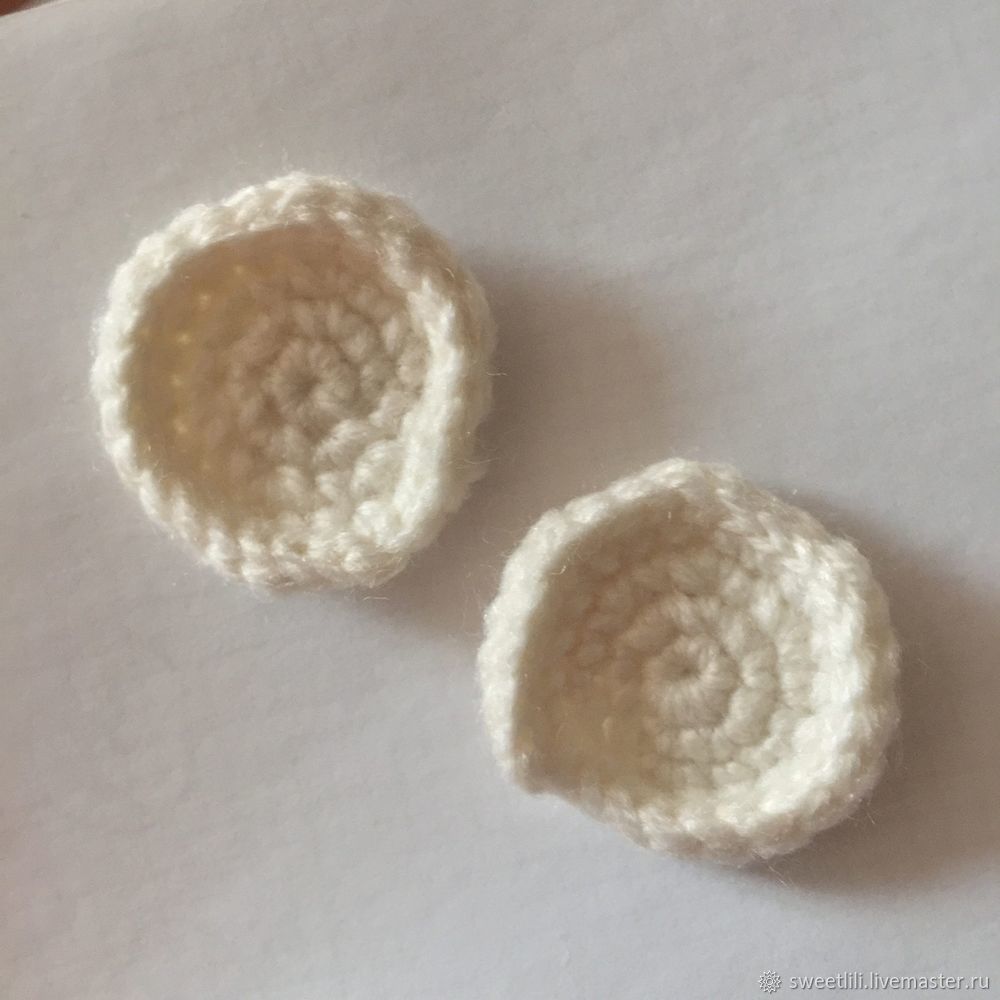
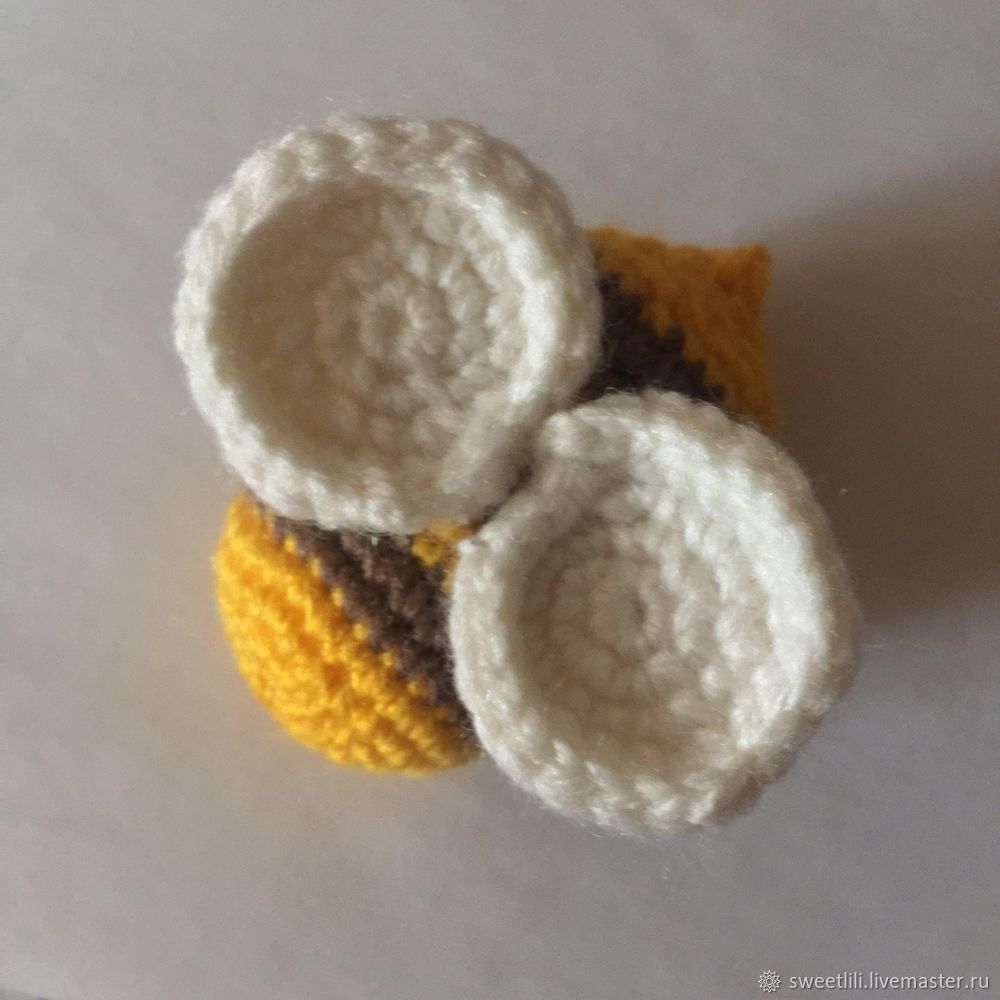
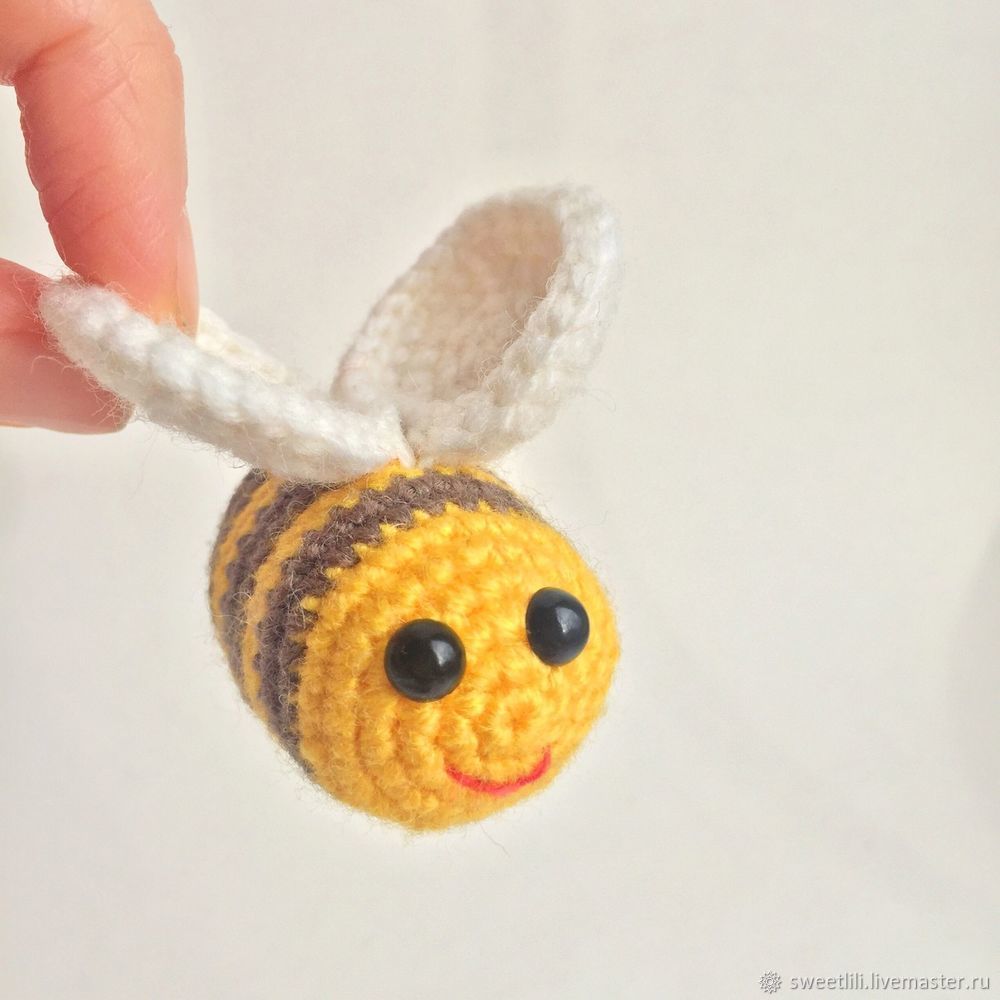
Crocheting adorable amigurumi creatures is a fun and creative way to bring small, lovable characters to life. This amigurumi crochet bee pattern is perfect for beginners and advanced crocheters alike, offering simple, step-by-step instructions to create your very own cute bee. The bee is crocheted in two alternating yarn colors (yellow and brown), stuffed as you go, and finished with delicate wings and a sweet smile

Crochet enthusiasts, whether you’re new to amigurumi or a seasoned crocheter, this adorable crochet bee pattern is a must-try! Amigurumi, the Japanese art of crocheting small, stuffed yarn creatures, has gained popularity for creating charming characters like this buzzing bee. With just a few basic crochet stitches, you’ll be able to craft this cute little bee that can be used as a toy, decoration, or even a unique gift.

Continua apĂ³s a publicidade..

In this tutorial, we’ll guide you through each step of the process, from making the bee’s body and wings to assembling it and giving it a cheerful face. The project uses two colors for the bee’s iconic stripes, white for the wings, and is stuffed as you go to create its plump, lovable shape. Grab your hooks and yarn, and let’s start buzzing into this fun and easy project!

Amigurumi Crochet Bee Free Pattern
Continua apĂ³s a publicidade..

Materials:
Yarn: Brown and Yellow (for body), White (for wings)
Crochet hook (size suitable for your yarn)
Stuffing (polyfill)
Safety eyes or black thread to embroider the eyes
Yarn needle for sewing
Stitch marker (optional)
Glue (optional for eyes)

Abbreviations:
sc: single crochet
inc: increase (2 sc in the same stitch)
dec: decrease (sc two stitches together)
KA: magic circle

Body of the Bee

We will alternate between yellow and brown yarn as we crochet the bee’s body. Each row is labeled with the color to use, where w stands for yellow and f for brown.

Throughout the process, be sure to stuff the bee as you go to give it its adorable, plump shape.

w 1st row: 6 sc in KA (6)
w 2nd row: (inc) x 6 (12)
w 3rd row: (sc, inc) x 6 (18)
w 4th row: (2 sc, inc) x 6 (24)
w 5th row: (3 sc, inc) x 6 (30)
w 6th row: 30 sc (30)
w rows 7-8: 30 sc (30)

w rows 9-10: 30 sc (30)

w rows 11-12: 30 sc (30)
w rows 13-14: 30 sc (30)
w rows 15-16: 30 sc (30)

f 17th row: (3 sc, dec) x 6 (24)
w 18th row: (2 sc, dec) x 6 (18)
w 19th row: (sc, dec) x 6 (12)
f 20th row: (dec) x 6 (6)
f 21st row: sc 3 times to form the bee’s sting.

Fasten off, cut the yarn, and hide the tail inside the body.

Wings

The wings are made with white yarn and crocheted in a spiral. You will make two wings.

1st row: 6 sc in KA (6)
2nd row: (inc) x 6 (12)
3rd row: (sc, inc) x 6 (18)
4th row: (2 sc, inc) x 6 (24)
5th row: dc in each stitch around (24)

You can either leave a long yarn tail for sewing the wings to the body or sew them on with regular thread. After sewing, cut the thread and hide the ends.

Assembly

Sew the wings: Place the wings in the center of the bee’s back and sew them securely.

Attach the eyes: Use glue for safety eyes or embroider the eyes with black thread.

Embroider the smile: Add a cute, smiling face to give your bee personality.

Now that you’ve completed your adorable amigurumi crochet bee, it’s time to enjoy your creation! This little bee makes a great gift or cheerful decoration, and you can customize it by using different colors or adding extra embellishments like stripes or tiny antennae.

Feel free to make more bees and create a whole buzzing family! Happy crocheting!

You may also like...