Crochet Abbreviations
MR – Magic Ring
sc – Single Crochet
inc – Increase, work 2 single crochets in the same stitch
dec – Decrease, crochet 2 stitches together
dc – Double Crochet
st – Stitch
sts – Stitches
Special Stitch
Wing/Bobble Stitch
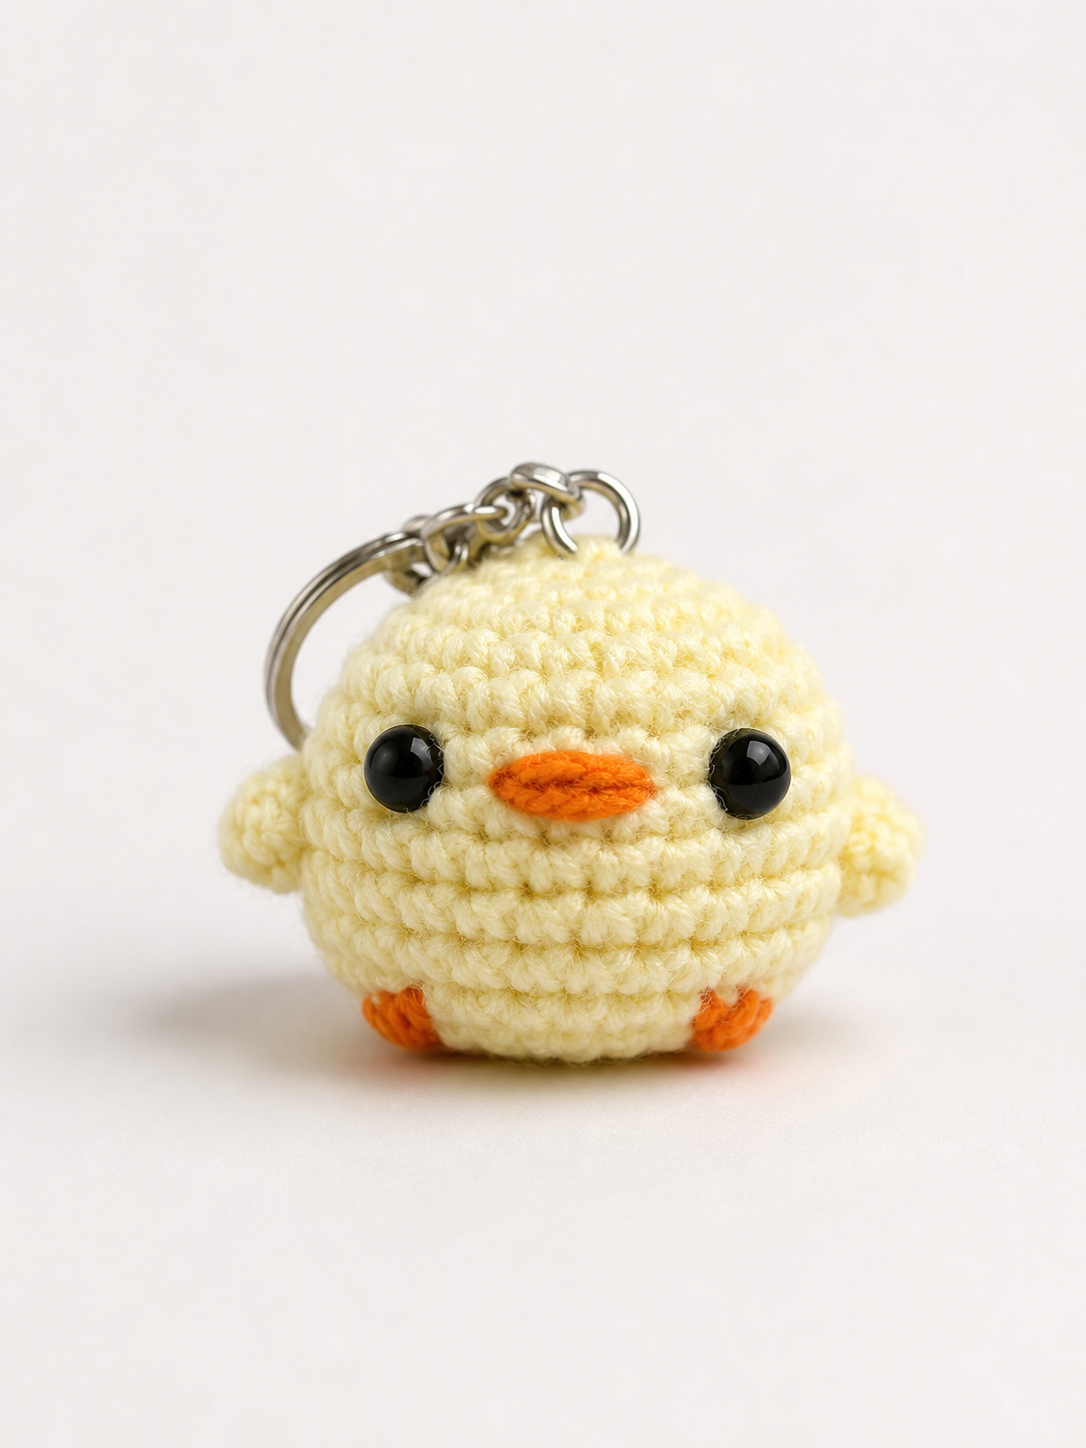
For this pattern, the small wings are created by working 5 double crochets into the same stitch.
These groups of double crochet stitches create the little rounded wings on each side of the chick.
Crochet Chick Instructions
The chick is worked from the top toward the bottom.
Use a stitch marker to mark the first stitch of every round. Unless otherwise stated, do not join the rounds.
Round 1
Work 6 sc into a magic ring.
Total: 6 stitches
Round 2
Work 2 sc in each stitch around.
Total: 12 stitches
Round 3
Repeat:
1 sc, inc
6 times around.
Total: 18 stitches
Round 4
Repeat:
2 sc, inc
6 times around.
Total: 24 stitches
Rounds 5–7
Work 1 sc in each stitch around.
Total: 24 stitches
At this point, the body of your little chick will begin to take its rounded shape.
Round 8 – Wings
Work 5 dc into the next stitch to create the first wing.
Work 11 sc.
Work 5 dc into the next stitch to create the second wing.
Work 11 sc.
You should now have one little wing positioned on each side of the chick.
Add the Eyes
Insert the safety eyes between Rounds 6 and 7. Position them evenly on the front of the chick. Before securing the washers permanently, check the placement carefully to make sure the face looks symmetrical.
Rounds 9–10
Work 1 sc in each stitch around.
Total: 24 stitches
Round 11
Repeat:
2 sc, dec
6 times around.
Total: 18 stitches
Round 12
Repeat:
1 sc, dec
6 times around.
Total: 12 stitches
Begin stuffing the chick firmly with fiberfill.
Add the stuffing gradually so the body remains round without stretching the stitches too much.
Round 13
Work 6 decreases around.
Total: 6 stitches
Fasten off, leaving a small yarn tail.
Using your yarn needle, weave the yarn through the front loops of the remaining stitches. Pull firmly to close the opening and weave in the yarn end.
Yarn Color Ideas
Classic pale yellow is perfect for creating the traditional baby chick appearance, but you can easily experiment with different colors.
Try making your chicks in:
- Bright yellow
- Pastel yellow
- Cream
- White
- Soft pink
- Pastel blue
- Lavender
- Mint green
A collection of pastel-colored chicks would make a particularly cute decoration for spring or Easter.
A Quick Project for Leftover Yarn
One of the best things about this little amigurumi pattern is that it requires only a small amount of yarn.
If you regularly crochet blankets, scarves, or larger amigurumi projects, this is an excellent way to use those small leftover yarn balls that are too pretty to throw away.
Because the pattern has only 13 rounds, you can also make several chicks in different colors and turn them into matching keychains or small gifts.
Final Thoughts
This Cute Crochet Chick Keychain Pattern proves that even a very small crochet project can be full of charm. With simple stitches and only a few rounds of shaping, you can create an adorable little chick that is perfect for spring, Easter, gifts, or everyday accessories.
Once you have made your first chick, try experimenting with different yarn colors, facial expressions, or accessories. These tiny amigurumi chicks are quick to make, easy to customize, and a lovely way to use leftover yarn.