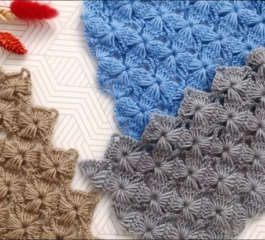
Crochet is a timeless craft that allows crafters to create intricate and stunning designs with just a hook and yarn. One of the most fascinating and visually appealing stitch patterns is the Crossed Puff Stitch Pattern. This unique stitch adds both texture and dimension to your crochet projects, making it a fantastic choice for blankets, scarves, vests, and even stylish summer tops.
Unlike standard puff stitches, this variation incorporates a crossed effect, giving the design a beautifully woven and structured appearance. The technique is easy to learn and can be adapted to different types of projects depending on the yarn and hook you choose.
If you’re looking to expand your crochet skills and try something new, this pattern is a great choice! Whether you’re making a warm and cozy afghan or a delicate lace-like garment, the crossed puff stitch adds a distinctive charm that sets your work apart. In this tutorial, we’ll guide you step by step through the process of creating this stunning stitch pattern so you can incorporate it into your next crochet project!
Crossed Puff Stitch Pattern
Materials Needed
Yarn: Choose a yarn suitable for your project (for baby blankets, use soft baby yarn; for dishcloths, use cotton yarn)
Hook: A crochet hook that complements your yarn choice (typically 3mm-5mm for most projects)
Scissors
Tapestry needle (for weaving in ends)
Step By step
Step 1: Creating the Foundation Chain Start by making a foundation chain of any even number of stitches, depending on the width of your project.
For a blanket: Approximately 90 cm (35 inches) of chains For a dishcloth or small project: 20-22 cm (8-9 inches) of chains Since we will be working with a mesh base, ensure your chain count is even.
Step 2: Creating the Mesh Foundation Chain 4 (this counts as the first double crochet and a chain space). Make a double crochet in the 6th chain from the hook.
Chain 1, skip 1 stitch, and double crochet into the next stitch. Repeat step 3 across the row. Turn your work. At the end of this step, your foundation row will look like an open mesh grid.
Step 3: Adding the Puff Stitches Chain 4 to begin a new row. Make a double crochet into the first mesh space.
For the first puff stitch: Yarn over, insert the hook into the space, pull up a loop 3 times (you should have multiple loops on your hook). Yarn over and pull through all loops.
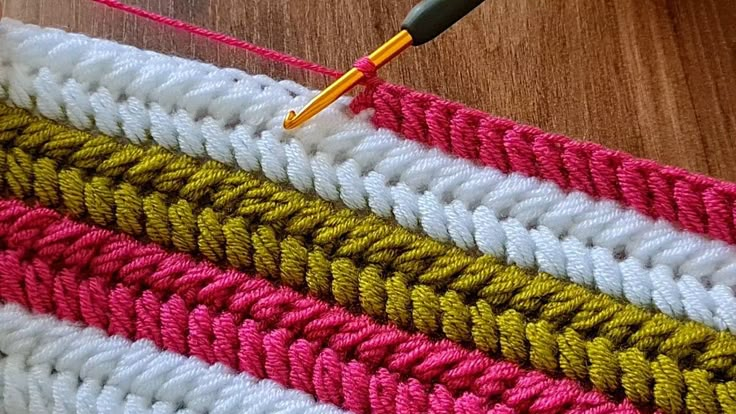
Skip to the next mesh space, make a double crochet. Go back to the previous mesh space and make another puff stitch. Continue alternating double crochet in one mesh space, puff stitch in the previous space. This technique creates crossed puff stitches, forming a beautifully textured pattern.
Step 4: Continuing the Crossed Puff Stitch Chain 4 to start the next row. Skip the first space and make a double crochet in the gap between two puff stitches.
Create a puff stitch in the top of the previous row’s puff stitch. Repeat this method across the row: double crochet – puff stitch in previous puff space. End the row with a double crochet for a neat edge.
Step 5: Changing Colors (Optional) If you want to add color variation: Cut the yarn and attach a new color at the beginning of a new row. Continue the pattern as usual, alternating colors as desired. If using one color, carry the yarn up along the edge.
Finishing Touches
Weave in the ends using a tapestry needle. Block your work if needed to maintain shape and texture. What Can You Make with the Crossed Puff Stitch?
This beautiful stitch is great for:
Cozy blankets
Scarves and shawls
Textured pillows
Sweaters and vests
Baby clothes and accessories
Experiment with different yarn colors and textures to create your own unique designs!
The Crossed Puff Stitch Pattern is a delightful technique that adds a creative flair to any crochet project. Whether you’re making a warm winter accessory or a stylish summer garment, this stitch will elevate your work. Try it today and enjoy the beauty of handmade crochet! Happy crocheting! 🧶✨