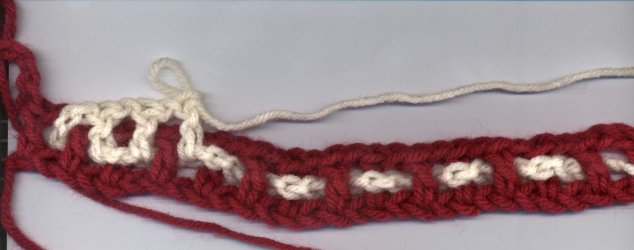
Below is a picture of the right side of the work with the row partially done, followed by one of the wrong side of the work with the row partially done:

Interlocking Filet Stitch
Interlocking Filet Stitch
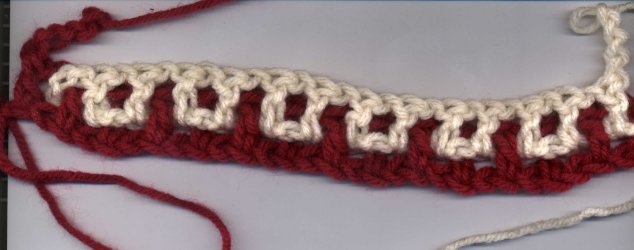
Below are pictures of the right side with the 2nd row finished, and the wrong side of the row finished:

Interlocking Filet Stitch
Interlocking Filet Stitch
Row 3
- Pick up the MC loop, and working with and into the MC, working in the back of the work, work the 1st dc into the first dc of Row 1.
- Ch 1, sk next ch, and working in front of the work, dc in next MC dc, ch 1, sk next ch, and working in back of the work, dc in next MC dc. Repeat from * across to the end.
- Hold the CC ch 4 towards you, working the last MC dc into MC dc.
- Ch 4, turn.
Below are pictures of the right and then wrong sides of the work finished to this point:
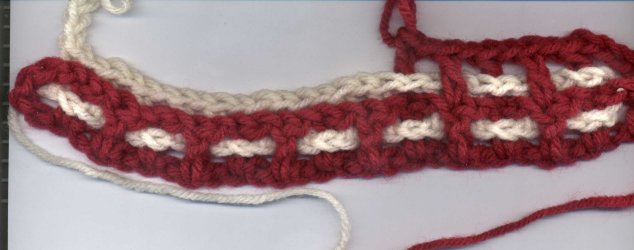
Interlocking Filet Stitch

Interlocking Filet Stitch
Row 4 and Following Even Rows
- Pick up and work the CC row, working all dcs into CC dcs in the previous CC row, working entirely behind the work.
- Ch 4. Do not turn.
Row 5 and Following Odd Rows
- Pick up and work the MC row, working every other MC dc behind the work into MC dcs in the previous MC row, and every other MC dc in front of the work into MC dcs in the previous MC row.
- Ch 4, turn.
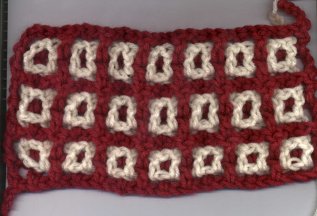
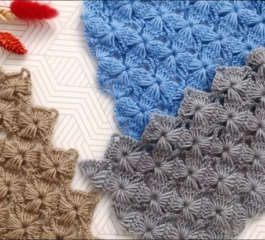
Below are pictures of the right and wrong sides of a sample piece with several rows complete:
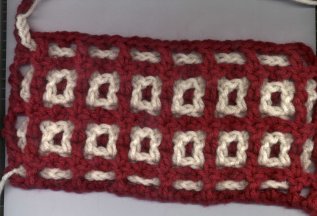
Interlocking Filet Stitch
See Another Pattern Here!
The Interlocking Filet Stitch creates a captivating woven look that adds depth and complexity to your crochet projects. By choosing two highly contrasting colors, you can make the intricate design truly stand out. Whether you’re making blankets, scarves, or home decor items, this stitch will bring a unique and elegant touch to your creations.
Happy crocheting! Be sure to share your projects and experiences in the comments below. Until next time, keep crafting and creating!