My Crafts Ideas

Free Patterns

Quilting Patterns

Paisley Splash Quilt Free Pattern

Welcome to My Crafts Ideas! Today, we dive into a pattern that effortlessly combines classic charm with contemporary flair—the Paisley Splash Quilt Pattern. This design is perfect for quilters of all levels who are eager to infuse their projects with vibrant colors and intricate designs.

The Allure of Paisley

Paisley, with its intricate teardrop-shaped motif, has a rich history that dates back to ancient Persia and India. It’s a pattern that has been cherished through the centuries, adorning everything from luxurious fabrics to modern-day fashion. The elegance of paisley lies in its versatility and timeless appeal, making it an excellent choice for quilting.

The beauty of the Paisley Splash Quilt lies in its colorful vibrancy. Select fabrics that not only feature paisley patterns but also solid colors that accentuate the paisley design. Opt for a mix of large and small prints to add depth and interest. For a more cohesive look, pick a color palette and stick to shades within that range.

Paisley Splash Quilt

Materials You’ll Need

To start your Paisley Splash Quilt, gather the following materials:

  • Fabric: Choose a selection of paisley-themed fabrics in various colors. Mix and match bold hues with subtle tones to create a dynamic splash effect.
  • Quilt Batting: Ensure you have the right thickness for your desired warmth and texture.
  • Thread: Complementary or contrasting colors based on your fabric choices.
  • Basic Quilting Tools: Rotary cutter, cutting mat, ruler, sewing machine, and quilting pins.

Cutting and Piecing

Cut Your Fabric: Start by cutting your fabric into squares or rectangles, depending on your desired quilt layout. A common size is 5-inch squares, but feel free to adjust to your preference.

Arrange Your Layout: Lay out your squares on a large surface to plan your design. Experiment with different arrangements until you find a pattern that pleases you. Aim for a balanced distribution of colors and patterns.

Sew the Pieces Together: Begin piecing your quilt by sewing the squares together in rows. Press the seams open or to one side, depending on your preference. Once your rows are complete, sew them together to form the quilt top.

Adding Borders and Quilting

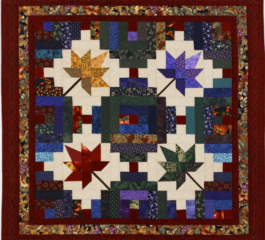
Add Borders: Consider adding borders to frame your paisley splash quilt. Choose a fabric that complements the inner quilt design. Borders can be single or multiple strips of fabric, depending on your desired look.

Quilting: Decide on a quilting pattern that enhances the paisley design. Free-motion quilting with paisley motifs can echo the main pattern, adding texture and cohesion. Alternatively, straight-line quilting offers a modern contrast to the intricate paisley.

Finishing Touches

  1. Binding: Finish your quilt with a binding that ties the entire design together. Choose a fabric that either contrasts for a bold finish or blends for a subtle edge.
  2. Label Your Quilt: Don’t forget to label your masterpiece. Include your name, the date, and any special message or title for your quilt.

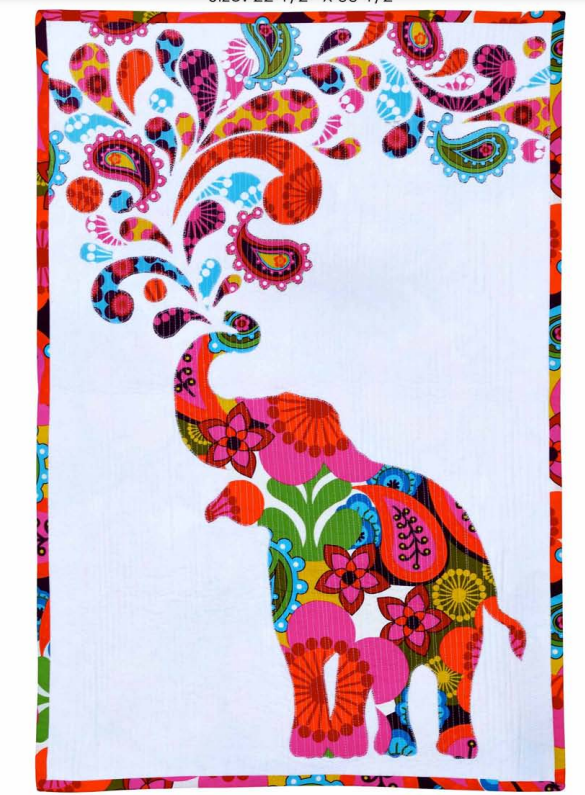
Once complete, your Paisley Splash Quilt will be a testament to your creativity and skill. Display it proudly as a centerpiece in your living space, drape it over a sofa, or use it as a bedspread. The vibrant colors and intricate designs are sure to be a conversation starter and a cherished piece for years to come.

FREE  PATTERN HERE!

Get ready to quilt! 🧵✨ The Paisley Splash Quilt Pattern is now available in PDF format. 📄⬇️ Download below and start your colorful quilting journey today! 🎨🪡🧶

FREE PATTERN

We’d love to see your Paisley Splash Quilt creations! Share your progress and finished quilts on social media using the hashtag #PaisleySplashQuilt. Connect with fellow quilters, exchange tips, and celebrate the art of quilting together.

Thank you for visiting My Crafts Ideas. Stay tuned for more exciting quilting patterns and crafting inspiration. Until next time, keep stitching!