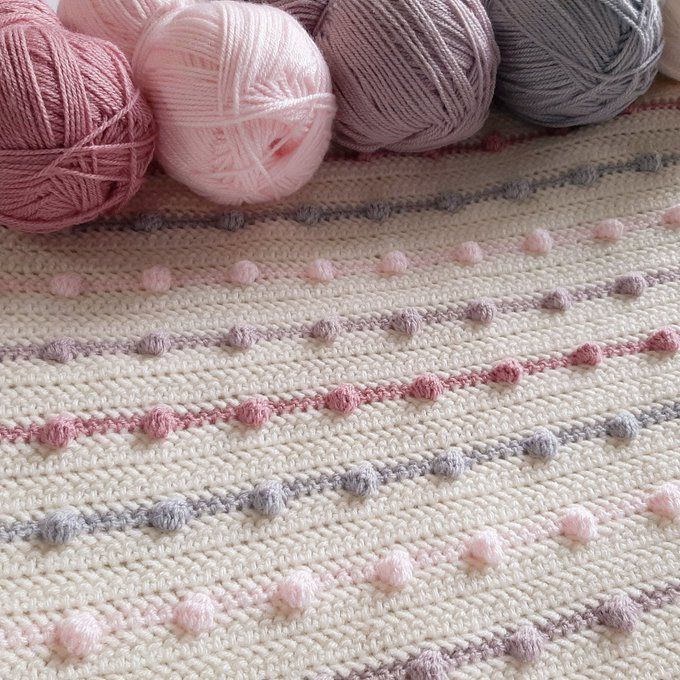
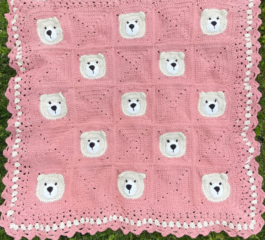
The bobbles generally project onto the side facing away from you as you make them. Keep their raised faces on the same side throughout the blanket.
Crochet Bobble Baby Blanket Pattern
Foundation and Rows 1–5: White
Foundation: With White, chain 120.
Row 1: Begin in the third chain from your hook. Work one HHDC into every remaining chain. You will have 118 stitches. Chain 2 and turn.
Rows 2–4: Work one HHDC into every stitch across. Chain 2 and turn after each row.
Row 5: Repeat the HHDC row. When completing the final stitch, stop with two loops remaining and finish the stitch with Navy. Cut White, leaving a weaving tail. Chain 1 with Navy and turn.
Row 6: Navy Bobbles
Work one SC into each of the first six stitches.
Repeat the following sequence across the row:
One DC5TOG bobble in the next stitch, followed by one SC in each of the next six stitches.
The row begins and ends with six SC, with 16 bobbles spaced between the SC groups.
Complete the last SC with White. Cut Navy, leaving a weaving tail. Chain 2 with White and turn.
Rows 7–11: White
Work one HHDC into each stitch across for five rows.
After Rows 7–10, chain 2 and turn. At the end of Row 11, complete the final stitch with Soft Peach. Cut White, leave a tail, chain 1 with Soft Peach, and turn.
Row 12: Soft Peach Bobbles
Repeat the stitch sequence from Row 6 using Soft Peach.
Complete the last SC with White. Cut Soft Peach, leave a tail, chain 2 with White, and turn.
Rows 13–17: White
Work five rows of HHDC, placing one stitch into each stitch across.
Chain 2 and turn after Rows 13–16. At the end of Row 17, change to Aqua during the final pull-through. Cut White, leave a tail, chain 1 with Aqua, and turn.
Row 18: Aqua Bobbles
Repeat Row 6 using Aqua.
Change to White in the last SC. Cut Aqua, leave a tail, chain 2 with White, and turn.
Rows 19–23: White
Work five rows of HHDC.
Chain 2 and turn after Rows 19–22. At the end of Row 23, complete the final stitch with Soft Red. Cut White, leave a tail, chain 1 with Soft Red, and turn.
Row 24: Soft Red Bobbles
Repeat Row 6 using Soft Red.
Complete the last SC with White. Cut Soft Red, leave a tail, chain 2 with White, and turn.
Rows 25–29: White
Work five rows of HHDC.
Chain 2 and turn after Rows 25–28. If continuing the blanket, change to Navy at the end of Row 29. Cut White, leave a tail, chain 1, and turn.
Continue the Color Repeat
Repeat Rows 6–29, keeping the bobble colors in this order:
Navy → Soft Peach → Aqua → Soft Red
Always work five white HHDC rows after each bobble row. Finish the body after a complete five-row white section.
For a blanket with 16 bobble rows, work four full color cycles. This produces 101 body rows: five initial white rows, plus 16 groups of one bobble row and five white rows.
On the final white row, stay in White instead of preparing another colored stripe.
Ribbed Blanket Border
The border consists of one round of DC, five rounds of alternating post stitches, and one final round of SC.
For clear starting and finishing points, the following instructions use joined rounds. Keep the raised-bobble side facing you, and do not turn between rounds.
Round 1: Double Crochet Foundation
Join White in a corner. Chain 3, counting this as the first DC, and work two more DC into the same corner.
Continue around the blanket, working one DC into each stitch along the top and bottom and distributing DC evenly along the row ends. At each remaining corner, work three DC into the corner.
Check that the border rests flat. Too many stitches along a side can create ripples, while too few can draw the fabric inward.
Before joining, make sure the total number of DC stitches is even so the alternating post pattern can meet cleanly. If necessary, adjust by one stitch along a straight edge.
Join with a SL ST to the top of the beginning chain 3. The starting corner already contains three DC; do not add another corner group there.
Mark the middle DC of each corner group.
Round 2: Begin the Ribbing
Chain 2; this does not count as a stitch.
Starting around the first DC post, alternate one FPDC and one BPDC around the blanket. Treat the beginning chain 3 from Round 1 as a DC post when working around it.
At each marked corner post, work three post stitches around that same post, maintaining the alternating sequence:
- If the next stitch should be an FPDC, work FPDC, BPDC, FPDC around the corner post.
- If the next stitch should be a BPDC, work BPDC, FPDC, BPDC around the corner post.
Continue with the opposite stitch around the following post. Mark the middle stitch of each new corner group.
Join with a SL ST to the first post stitch, leaving the beginning chain 2 unworked.
Rounds 3–6: Build the Border
Chain 2 and repeat the alternating post-stitch round four more times.
Along each side, work FPDC around FPDC and BPDC around BPDC so the raised and recessed columns remain aligned.
At each marked corner, work three alternating post stitches around the middle corner post, following the same corner method as Round 2.
Move the corner markers to the middle stitches of the new corner groups. Join each round to its first post stitch.
After Round 6, you will have six border rounds in total: one DC round and five ribbed rounds. To adjust the border depth, change the number of post-stitch rounds before adding the finishing round.
Round 7: Single Crochet Finish
Chain 1; this does not count as a stitch.
Work one SC into each stitch around, placing three SC into the marked middle stitch at each corner in place of the single SC.
Join with a SL ST to the first SC. Fasten off and weave in all remaining ends.
Finishing and Blocking
Lay the blanket flat and gently arrange the edges. If suitable for your yarn, pin the corners into shape, lightly mist the blanket, and leave it to air-dry completely.
Follow the yarn’s care instructions when choosing a blocking method. Let the fabric settle naturally without stretching the bobbles flat or pulling the border too tightly.
Make the Blanket Your Own
To adjust the width, choose a starting chain that is a multiple of 7 plus 8. For example, 106, 120, and 134 chains all preserve the bobble spacing and the six-SC groups at both edges.
To change the length, add or remove bobble rows together with their following five white rows. You can also use one accent color throughout, alternate two shades, or select four colors from the same family while keeping the stitch sequence unchanged.
Conclusion
The Crochet Bobble Baby Blanket brings together a repeating stripe sequence, raised texture, and a substantial ribbed edge. Choose your colors, check your stitch count as you work, and enjoy watching each new bobble row take shape.
Which color combination would you choose for yours? Share your ideas or a photo of your finished blanket in the comments.