Crochet Easter Bunnies for Beginners

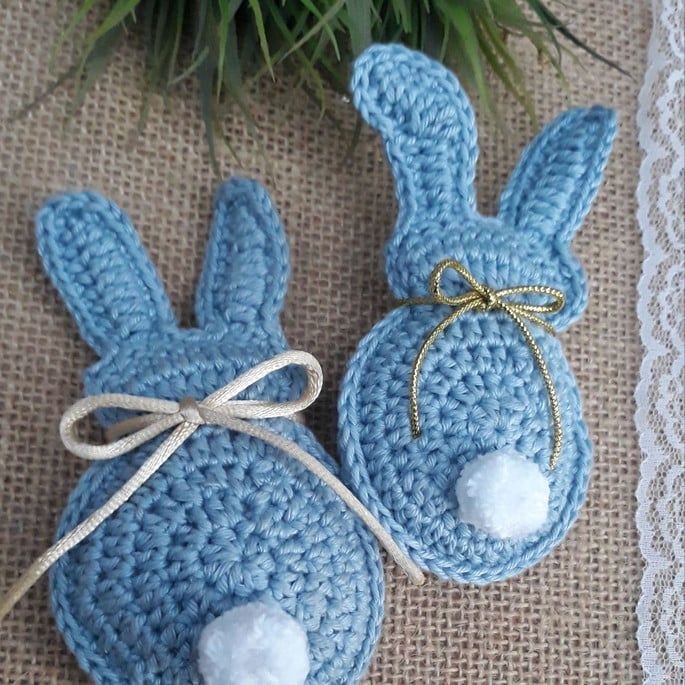
Easter is a time of joy, renewal, and creativity, making it the perfect opportunity to craft something special with your own hands. Whether you’re looking for a cute holiday decoration, a handmade gift for a loved one, or just a fun crochet project, these adorable Easter bunnies are a fantastic choice.

They are simple to make, even for beginners, and require only a few basic stitches and materials. Plus, they’re a great way to practice your crochet skills while creating something delightful that will bring a smile to anyone’s face.

In this guide, we’ll take you step by step through the process of crocheting an Easter bunny. You’ll learn how to create the body, head, ears, and finishing touches, resulting in a soft, stuffed bunny that’s perfect for Easter baskets, festive home décor, or as a charming handmade toy. So grab your crochet hook, some yarn, and let’s get started on this fun and easy Easter craft!

Crochet Easter Bunnies for Beginners

Crochet Easter Bunnies for Beginners

Materials and Crochet Stitches

Before getting started, gather the following materials:

  • Crochet yarn
  • Matching crochet hook
  • Wool needle
  • Scissors
  • Stuffing
  • White pompoms
  • Hot glue

You will primarily use single crochets and double crochets to shape your bunny.

How to Crochet the Bunny

Body
Round 1: Make 6 single crochets in a yarn ring.
Round 2: Double all stitches (12 single crochets).
Round 3: Double every second stitch (18 single crochets).

Round 4: Double every third stitch (30 stitches).
Cut the yarn and pull it through the last stitch.
Make a second identical circle for the other half of the bunny’s body.

Head
Round 1: Crochet 6 single crochets in a yarn ring.
Round 2: Double all stitches (12 single crochets).
Round 3: Double every second stitch (18 stitches).

Before cutting the yarn, attach the head to the body using three single crochets.
Cut the yarn and pull it through.
Create a second small circle for the other half of the head and attach it to the body.

ears
Row 1: Crochet 6 chain stitches plus 1 turning stitch.
Row 2: Work 6 single crochets, starting in the second stitch from the hook.

Row 3: Work:
2 single crochets
2 half double crochets
1 double crochet
2 double crochets in the last stitch
Mirror the pattern on the other side
Cut the yarn and pull it through.
Make a second identical ear.

Assembling the Bunny

  1. Join the Two Halves
    • Place the two body halves together.
    • Use the crochet hook to stitch them together with single crochets.
    • Leave an opening for stuffing.
  2. Stuffing
    • Fill the bunny with cotton wool or stuffing before closing it completely.
    • Finish crocheting around the edges to secure the stuffing inside.
  3. Attach the Ears
    • Sew the ears onto the bunny using a wool needle.
    • Hide any excess yarn inside the bunny.
  4. Final Touch
    • Use hot glue to attach a small white pompom as the bunny’s tail.
Your Adorable Crochet Easter Bunny is Ready!

This simple project is perfect for beginners and makes for a wonderful Easter gift or decoration. With just a few basic crochet stitches, you can create charming bunnies to spread Easter joy. Happy crocheting!

You Are Here:

We use cookies to offer you the best experience on our website. By continuing to browse, you confirm that you accept these terms.