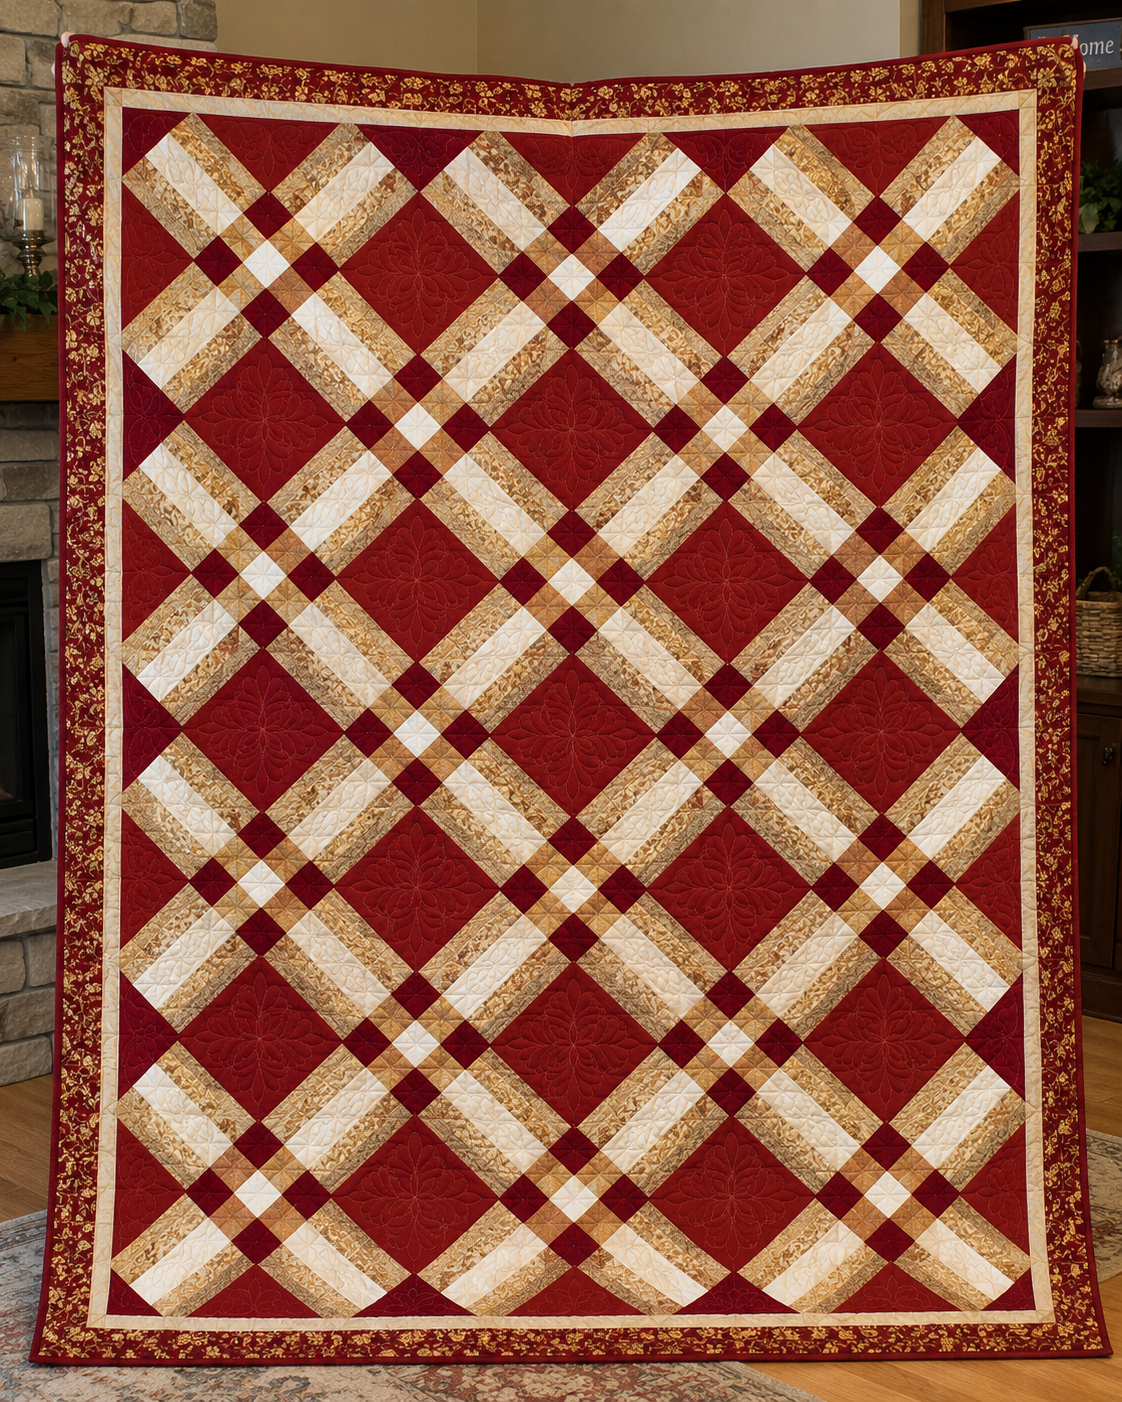
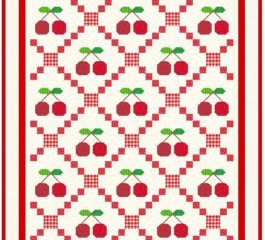
56″ × 73″
This is a comfortable size for a throw quilt, sofa quilt, lap quilt, or decorative bed cover.
Pattern Details
Pattern Name: Interlace Quilt Pattern
Finished Size: approximately 56″ × 73″
Skill Level: Confident Beginner to Intermediate
Technique: Traditional Piecing
Style: Geometric / Modern Traditional
Main Fabric Formula: Five coordinated 1-yard cuts
Fabric Requirements
The quilt works best when the five main fabrics have noticeably different values.
For the color arrangement shown in the design, use approximately:
- 1 yard Fabric 1 — darkest
- 1 yard Fabric 2 — dark print
- 1 yard Fabric 3 — medium value
- 1 yard Fabric 4 — light value
- 1 yard Fabric 5 — lightest fabric
- ⅝ yard border fabric
- ⅝ yard binding fabric
- Approximately 3½ yards backing fabric
- Batting slightly larger than the finished quilt
The exact yardage can vary depending on fabric width, border construction, and how efficiently the pieces are cut.
Choosing the Right Fabrics
Fabric contrast is one of the most important parts of this quilt.
The black, gray, and white version creates a very bold optical effect because the value differences are easy to see.
You do not have to use neutrals, however.
Try arranging your five fabrics from darkest to lightest.
For example:
Blue version
Navy → royal blue → medium blue → pale blue → white
Red version
Burgundy → ruby red → medium red → blush → cream
Purple version
Deep plum → violet → lavender → pale lilac → white
Christmas version
Dark green → red → gold → pale green → cream
Floral version
Dark coordinating solid → dark floral → medium floral → pale print → ivory
The stronger the contrast between your darkest and lightest fabrics, the easier it will be to see the interwoven design.
Cutting the Main Fabrics
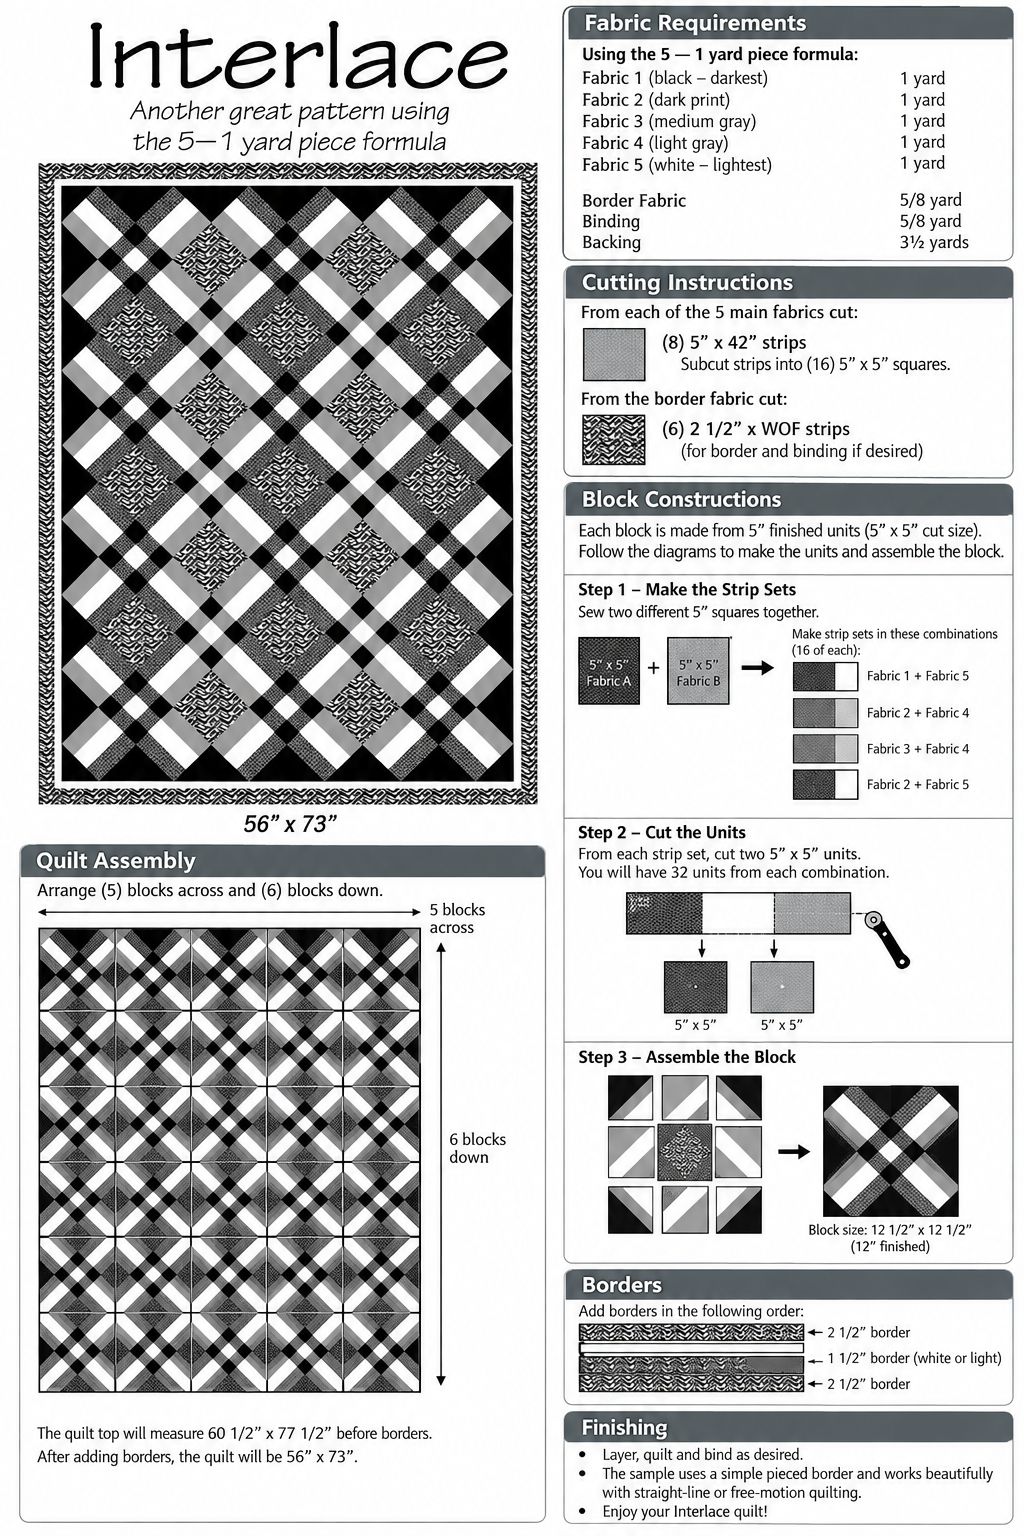
The illustrated guide uses five main fabrics cut into strips and square units.
A practical approach is to cut the fabrics into consistent strips first, then subcut those strips into matching squares.
The diagram suggests cutting several strips from each fabric and then cutting those strips into 5″ squares.
Before cutting your entire fabric selection, it is a good idea to make one test block.
This allows you to confirm:
- your seam allowance
- your final block size
- the direction of the fabrics
- the contrast between colors
- the accuracy of the finished dimensions
This small extra step can save a great deal of fabric later.
Understanding the Interlace Block
The most interesting part of the pattern is the way the fabric strips appear to cross one another.
Each block contains contrasting diagonal sections.
Dark fabrics form one part of the visual pathway, while lighter fabrics form another.
When neighboring blocks are rotated and repeated, these pathways continue across the quilt and create the woven appearance.
Small squares at the intersections reinforce the illusion.
That is why careful fabric placement is more important than complicated sewing.
Step 1: Make the Fabric Units
Begin by pairing two contrasting fabrics.
Place the pieces right sides together and sew using a consistent ¼” seam allowance.
Press the seams carefully.
Continue making the required fabric combinations.
The design benefits from several repeated pairings, such as:
- darkest + lightest
- dark + light
- medium + light
- dark print + white
Keep each combination in a separate labeled group.
This makes block assembly much easier.
Step 2: Cut and Organize the Units
Once your strip sets or paired units are complete, subcut them into the required sections.
Accuracy is especially important here.
If the units are even slightly different in size, the diagonal lines may not meet cleanly when the blocks are joined.
Use a quilting ruler and rotary cutter whenever possible.
After cutting, organize the units by fabric combination.
A small design board can be very helpful.
Step 3: Assemble the Block
Lay out all the pieces before sewing.
The block should show diagonal light and dark sections crossing around a contrasting center.
Check the orientation carefully.
It is very easy to rotate one unit accidentally.
Once the arrangement is correct, sew the pieces together in sections or rows.
Press as you go.
Where possible, press adjoining seams in opposite directions so the seam allowances nest together.
This helps create sharper intersections.
Creating the Woven Effect
One block by itself may not reveal the full Interlace design.
The magic happens when several blocks are placed side by side.
Rotate and position the blocks according to the quilt layout.
As the rows grow, you will begin to see long diagonal ribbons appear.
Those ribbons seem to travel underneath and over neighboring bands, creating the woven illusion.
Before sewing the final rows together, step back and look at the entire layout.
This is the best time to catch a rotated block.
Taking a quick photograph can also make incorrect placement easier to spot.
Quilt Assembly
The illustrated layout arranges the blocks in a rectangular grid.
Begin by completing all the blocks first.
Next, arrange them on a design wall, clean floor, or large table.
Pay close attention to the direction of the diagonal bands.
Sew the blocks into horizontal rows.
Press the seams of alternating rows in opposite directions.
Then join the rows.
Continue checking the alignment as you sew.
The finished center should display a continuous lattice of diagonal fabric bands.
Adding the Border
The border gives the quilt a clean frame and visually contains the busy geometric center.
The design shown uses a patterned outer border that coordinates with one of the fabrics inside the quilt.
For a similar look, choose a border fabric with:
- a small geometric print
- black-and-white pattern
- subtle stripe
- tone-on-tone design
Measure the finished quilt center before cutting your borders.
For the most accurate results, determine the border length from the actual quilt top rather than relying only on theoretical measurements.
Sew the side borders first.
Press.
Then add the top and bottom borders.
Preparing the Quilt Sandwich
Once the quilt top is complete, press it thoroughly.
Prepare:
- Backing fabric
- Batting
- Finished quilt top
The backing and batting should extend several inches beyond the quilt top on all sides.
Smooth the layers carefully.
Baste using your favorite method.
You can use:
- safety pins
- thread basting
- temporary adhesive spray
Quilting Ideas for the Interlace Quilt
Because the piecing already creates so much movement, the quilting can remain relatively simple.
Straight-line quilting works beautifully.
Consider quilting parallel to the diagonal fabric bands.
Other options include:
- diagonal crosshatching
- stitch-in-the-ditch
- gentle waves
- large meandering
- geometric echo quilting
If you want the woven design to remain the main focus, avoid quilting that is too dense or visually complicated.
Binding
After quilting, trim the excess batting and backing.
Square the quilt carefully.
Cut binding strips approximately 2½” wide.
Join the strips with diagonal seams to create one continuous binding.
Press the strip in half lengthwise.
Attach it around the quilt using your preferred binding method.
For a modern finish, machine stitch the binding.
For a more traditional appearance, sew the final edge by hand.
Tips for Better Results
A few small details can make a major difference in this pattern.
Keep your ¼” seam allowance consistent throughout the project.
Label the fabrics from darkest to lightest before cutting.
Make one sample block first.
Check block orientation before every seam.
Use pins at important intersections.
Square the blocks before assembling the quilt.
And most importantly, frequently step away from the quilt and look at the entire design.
The Interlace pattern depends on the secondary pattern created between neighboring blocks, so viewing the quilt from a distance is extremely helpful.
Why the Interlace Quilt Is So Interesting
This quilt is a wonderful example of how fabric placement can completely transform simple patchwork.
Up close, you can see individual geometric pieces.
From a distance, those pieces disappear into larger diagonal bands, diamonds, and crossing pathways.
That visual transformation is what gives the Interlace Quilt Pattern its distinctive character.
It is also an excellent design for experimenting with color.
Changing only the five fabrics can turn the same pattern into something elegant, romantic, dramatic, modern, or traditional.
Free Interlace Quilt Pattern PDF
To make the project easier to follow, the printable pattern can include:
- Full quilt diagram
- Fabric requirements
- Cutting instructions
- Fabric combination guide
- Step-by-step block construction
- Block assembly diagram
- Complete quilt layout
- Border guide
- Finishing instructions
Use the printable diagrams together with the tutorial while sewing so you can easily check the placement and orientation of every unit.
Download the complete Interlace Quilt Pattern PDF below.
Interlace Quilt Pattern PDF
The Interlace Quilt Pattern offers an impressive woven appearance without requiring extremely complicated sewing techniques. The real beauty of the project comes from careful color placement, accurate piecing, and the way the blocks interact with one another.
With only five main fabrics, you can create a quilt filled with movement, contrast, and beautiful secondary patterns. Whether you choose classic black and white, rich jewel tones, romantic florals, or soft pastels, the Interlace design provides plenty of possibilities for making the quilt completely your own.